OpenCV之人脸疲劳检测
1.dlib
dlib 是一个用 C++ 编写的开源机器学习库,同时也提供了 Python 接口,它被广泛应用于计算机视觉和机器学习领域:
1.人脸识别与生物特征分析
dlib 的人脸检测和关键点定位功能是其最突出的应用方向。通过预训练模型(如 HOG + SVM 或深度学习模型),dlib 可实现高效的人脸检测、68 个面部关键点定位(如眼睛、嘴唇、下巴等)
。例如:
- 安全系统:用于门禁、身份验证,结合活体检测技术(如眨眼识别)防止照片或视频伪造
- 社交媒体:支持美颜滤镜、表情分析(如情绪识别)和虚拟试妆
2.计算机视觉任务
dlib 提供多种图像处理算法,支持以下场景:
- 物体检测与跟踪:利用 HOG 特征和 SVM 分类器检测车辆、行人等目标,适用于智能交通系统中的车牌识别或违规行为监控,如 OpenCV之目标追踪
- 图像增强与分割:包括降噪、边缘检测和图像对齐功能,提升医学影像分析(如肿瘤检测)的准确性
3.机器学习算法集成
dlib 实现了多种经典和现代算法,如:
- 分类与回归:支持向量机(SVM)、决策树、线性回归等,适用于数据分类和预测任务
- 深度学习:结合预训练模型处理复杂任务(如姿态估计),兼容实时计算需求
4.实时系统开发
其优化的内存管理和高效算法使其适合嵌入式设备和实时处理:
- 摄像头监控:实时人脸跟踪、驾驶员疲劳检测(通过眼部闭合频率判断)
- 交互式应用:如虚拟现实中的面部动作捕捉
5.跨领域创新应用
- 医疗保健:辅助康复训练监测(如关节活动分析)、医疗影像中的器官识别
- 智能交通:交通流量监控、违法行为记录(如未系安全带检测)
6.跨平台与多语言支持
dlib 兼容 Windows、Linux、macOS 等系统,并提供 Python 接口,便于集成到不同项目中
7.预训练模型
| 模型 | 用途 | 适用场景 |
|---|---|---|
mmod_human_face_detector.dat |
高精度 CNN 人脸检测 | 安防、监控 |
shape_predictor_68_face_landmarks.dat |
68 点关键点检测 | 美颜、AR、疲劳检测 |
shape_predictor_5_face_landmarks.dat |
5 点关键点检测 | 人脸对齐、移动端 |
dlib_face_recognition_resnet_model_v1.dat |
人脸特征提取 | 人脸识别、身份验证 |
hand_landmark_detector.dat |
手部关键点检测 | 手势交互 |
2.人脸关键点检测
如何用shape_predictor_68_face_landmarks.dat来做人脸检测,并可视化人脸的关键部位,如眼睛、鼻子、嘴巴等。
1.人脸关键点
定义了68个关键点,如下分布: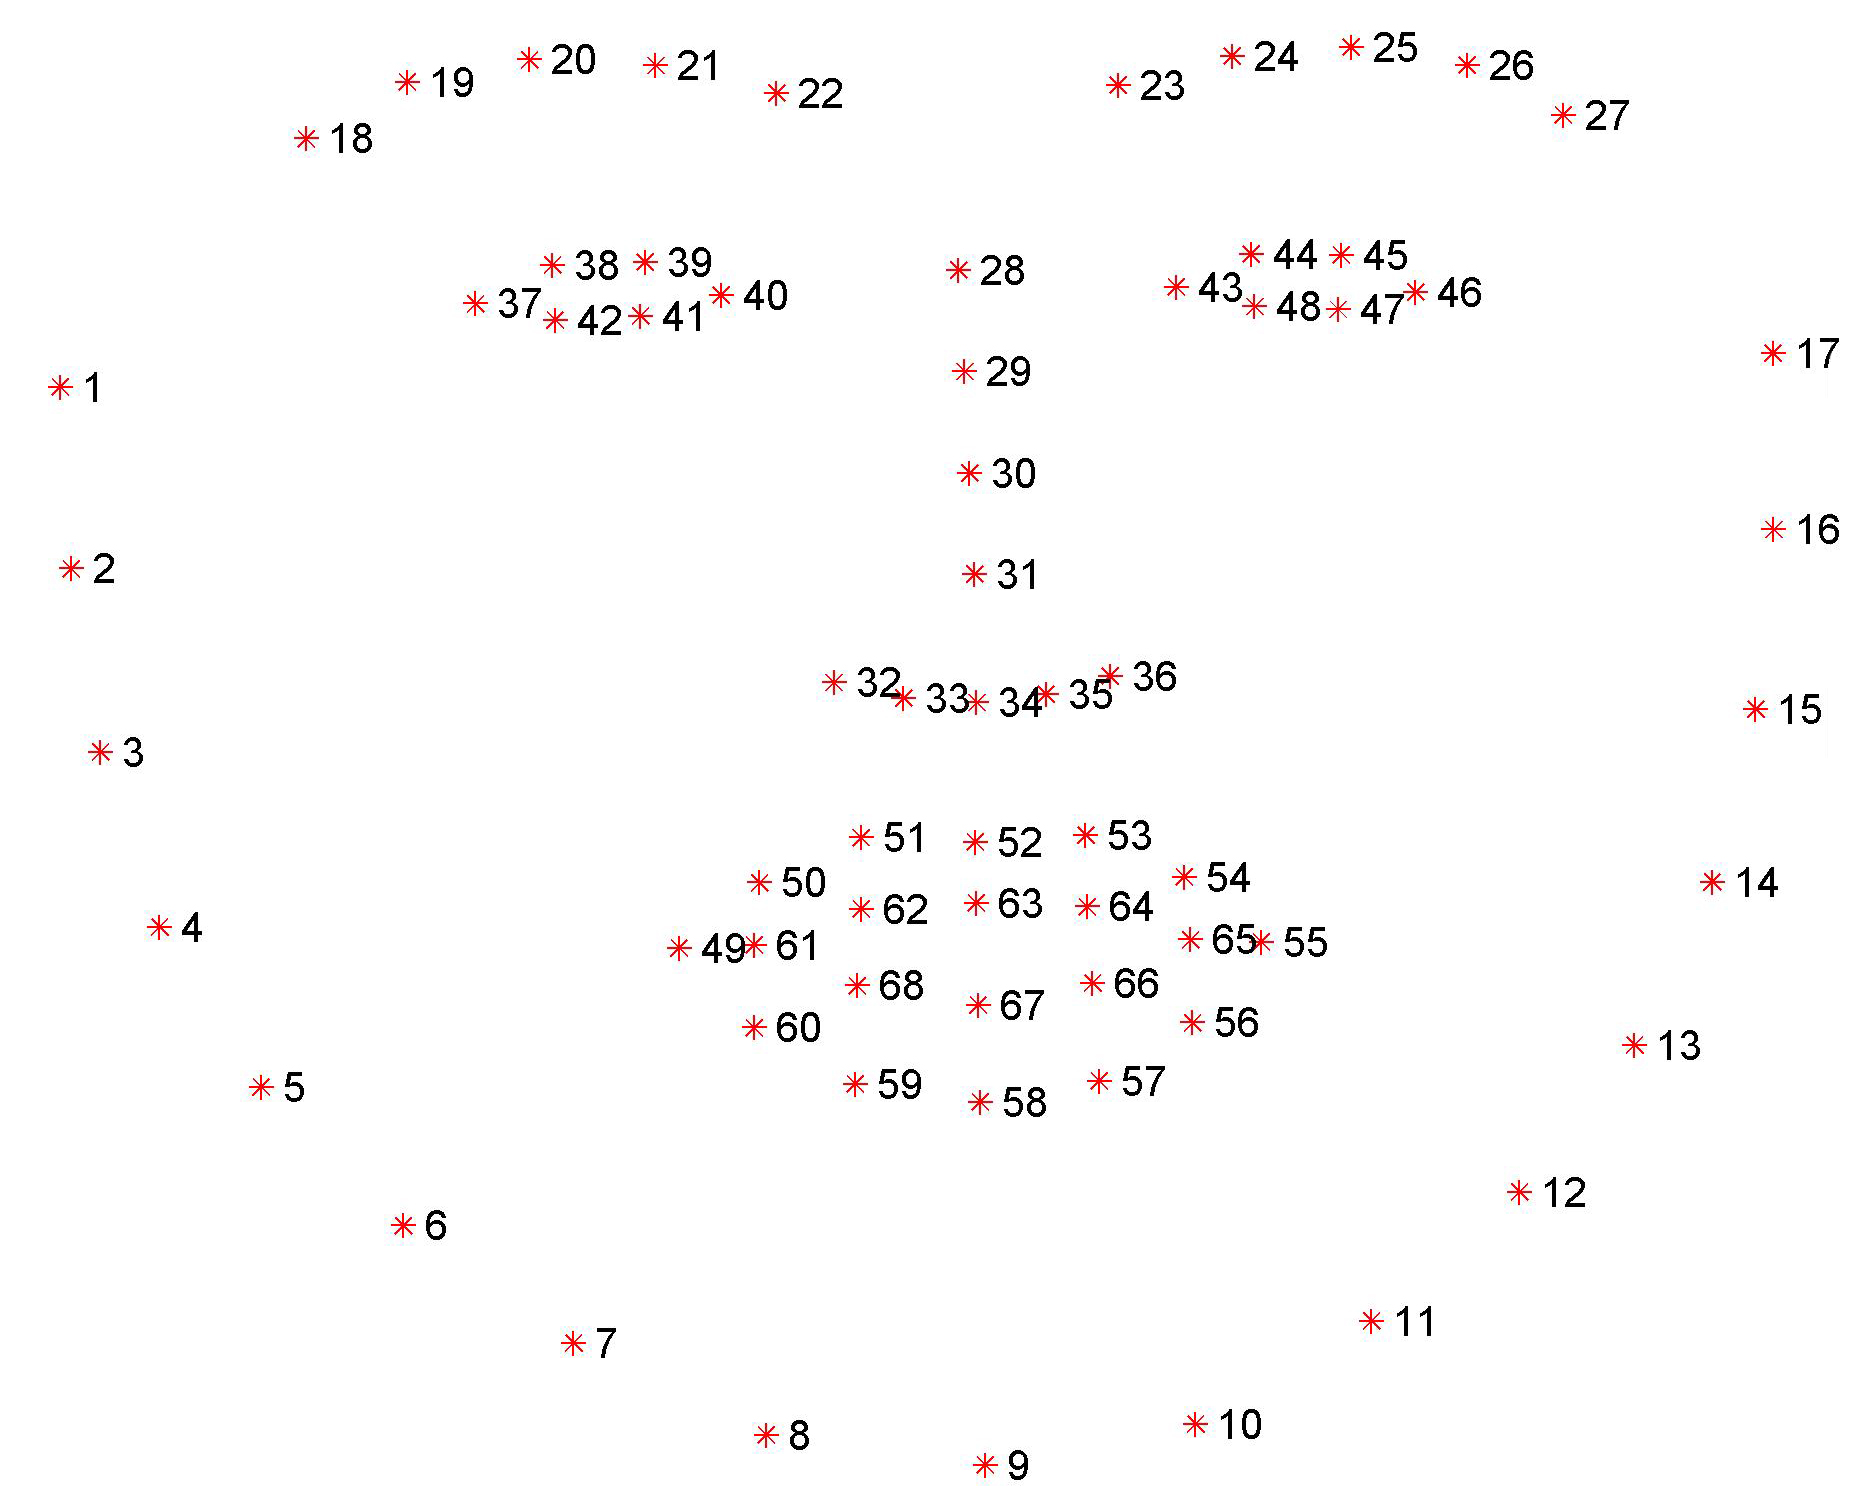
按关键点索引可分成以下7类:
1 | facial_landmarks = OrderedDict([ |
为何代码中的左右和图片中的左右是相反的?
当我们说右眉毛,我们通常指的是图片中人的右眉毛(也就是图像左边的眉毛),但在数据结构中,“right_eyebrow” 指的是我们从屏幕看的左边,这也是左右的定义在视觉上和数据上的差异。
2.shape to np
将 dlib 的 shape 转换成 numpy 数组
1 | def _shape_to_np(shape, dtype="int"): |
将 dlib.full_object_detection 类型的 shape,转成一个 (68, 2) 的 numpy 数组,方便后续处理。
3.主流程函数
使用 dlib 进行人脸检测与关键点定位,使用 OpenCV 对每个面部区域进行可视化
1 | def detect_face_part(image_path): |
OpenCV可视化如下:
4.可视化面部区域
1 | def _visualize_facial_landmarks(image, shape, colors=None, alpha=0.75): |

3.眨眼检测
原理:使用dlib进行人脸关键点识别,通过计算眼睛长宽比EAR(Eye Aspect Ratio)来判断是否闭眼,闭眼时间 > 1秒判定为疲劳。
1.计算眼睛长宽比(EAR)
1 | def _eye_aspect_ratio(eye): |
EAR值越小,表示眼睛越闭合。当 EAR < 0.3 且持续几帧,就认为眨了一次眼。
2.主流程函数
1 | def detect_blinks(path): |
4.总结
1.人脸关键点检测
- 使用 shape_predictor_68_face_landmarks.dat 实现 68 点人脸关键点定位
- 分区域提取面部部位(如眼睛、嘴、鼻子等),并通过 OrderedDict 定义索引范围
- 利用 OpenCV 可视化每个面部区域,包括点、轮廓和半透明区域高亮显示
2.眨眼检测原理
使用 EAR(Eye Aspect Ratio)判断眼睛是否闭合,当 EAR < 0.3 且连续超过 3 帧,视为一次眨眼
3.其它动作识别
除了眨眼识别,dlib还支持其它面部相关动作识别
| 动作 | 方法或指标 | 场景用途 |
|---|---|---|
| 打哈欠 | MAR(嘴巴长宽比) | 注意力检测、驾驶监控 |
| 张嘴说话 | 连续 MAR 变化 | 音视频同步、语音识别辅助 |
| 微笑识别 | 嘴角抬起 + 脸部肌肉张力 | 表情识别、用户反馈分析 |
| 头部点头/摇头 | 检测面部关键点相对移动轨迹 | 手势交互、虚拟现实 |
| 睁眼/闭眼识别 | EAR 静态阈值 + 多帧验证 | 活体识别、疲劳监测 |
5.备注
环境
- mac: 15.2
- python: 3.12.4
- numpy: 1.26.4
- opencv-python: 4.11.0.86
- dlib: 19.24.6
资源和代码
https://github.com/keychankc/dl_code_for_blog/tree/main/010_opencv_face_fatigue_detection