1
2
3
4
5
6
7
8
9
10
11
12
13
14
15
16
17
18
19
20
21
22
23
24
25
26
27
28
29
30
31
32
33
34
35
36
37
38
39
40
41
42
43
44
45
46
47
48
49
50
51
52
53
54
55
| def draw_parking(image, rects, thickness=1, save=False):
color = [255, 0, 0]
new_image = np.copy(image)
gap = 15.5
cur_len = 0
spot_dict = {}
tot_spots = 0
adj_y1 = {0: 20, 1: -10, 2: 0, 3: -11, 4: 28, 5: 5, 6: -15, 7: -15, 8: -10, 9: -30, 10: 9, 11: -32}
adj_y2 = {0: 30, 1: 50, 2: 15, 3: 10, 4: -15, 5: 15, 6: 15, 7: -20, 8: 15, 9: 15, 10: 0, 11: 30}
adj_x1 = {0: -8, 1: -15, 2: -15, 3: -15, 4: -15, 5: -15, 6: -15, 7: -15, 8: -10, 9: -10, 10: -10, 11: 0}
adj_x2 = {0: 0, 1: 15, 2: 15, 3: 15, 4: 15, 5: 15, 6: 15, 7: 15, 8: 10, 9: 10, 10: 10, 11: 0}
for key in rects:
tup = rects[key]
x1 = int(tup[0] + adj_x1.get(key, 0))
x2 = int(tup[2] + adj_x2.get(key, 0))
y1 = int(tup[1] + adj_y1.get(key, 0))
y2 = int(tup[3] + adj_y2.get(key, 0))
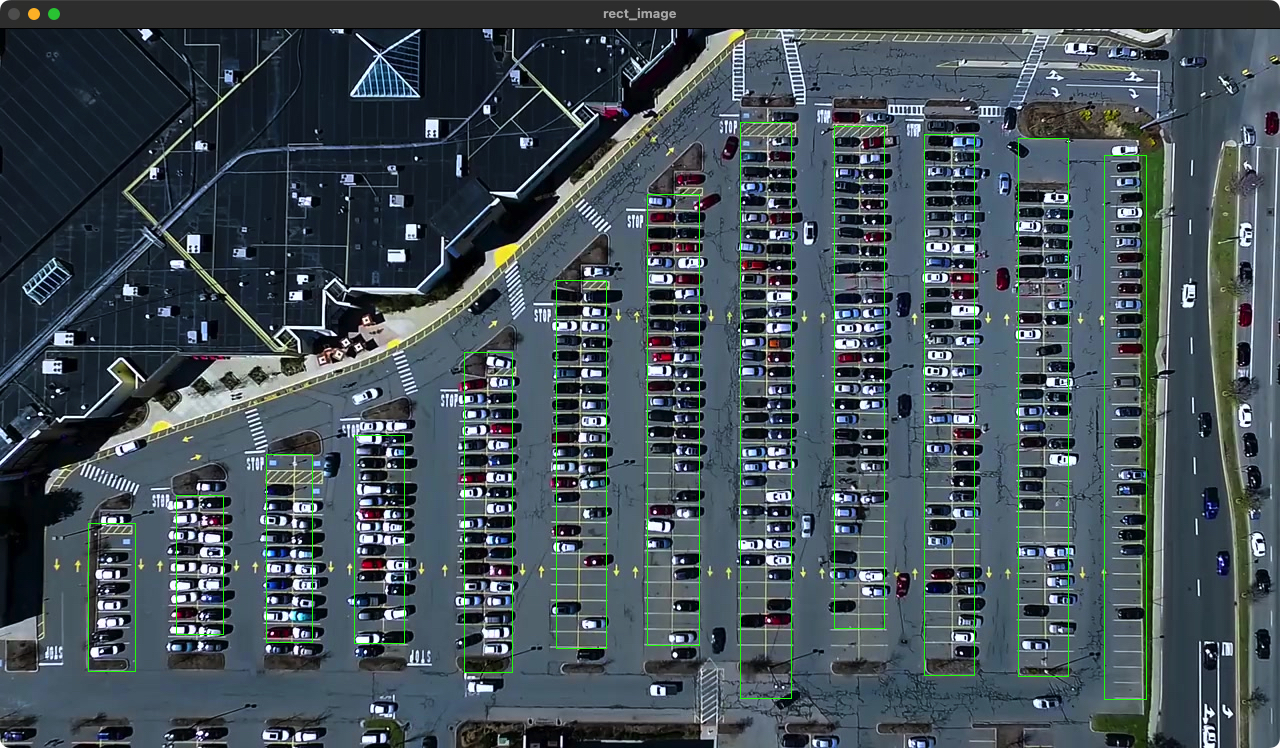
cv2.rectangle(new_image, (x1, y1), (x2, y2), (0, 255, 0), 1)
num_splits = int(abs(y2 - y1) // gap)
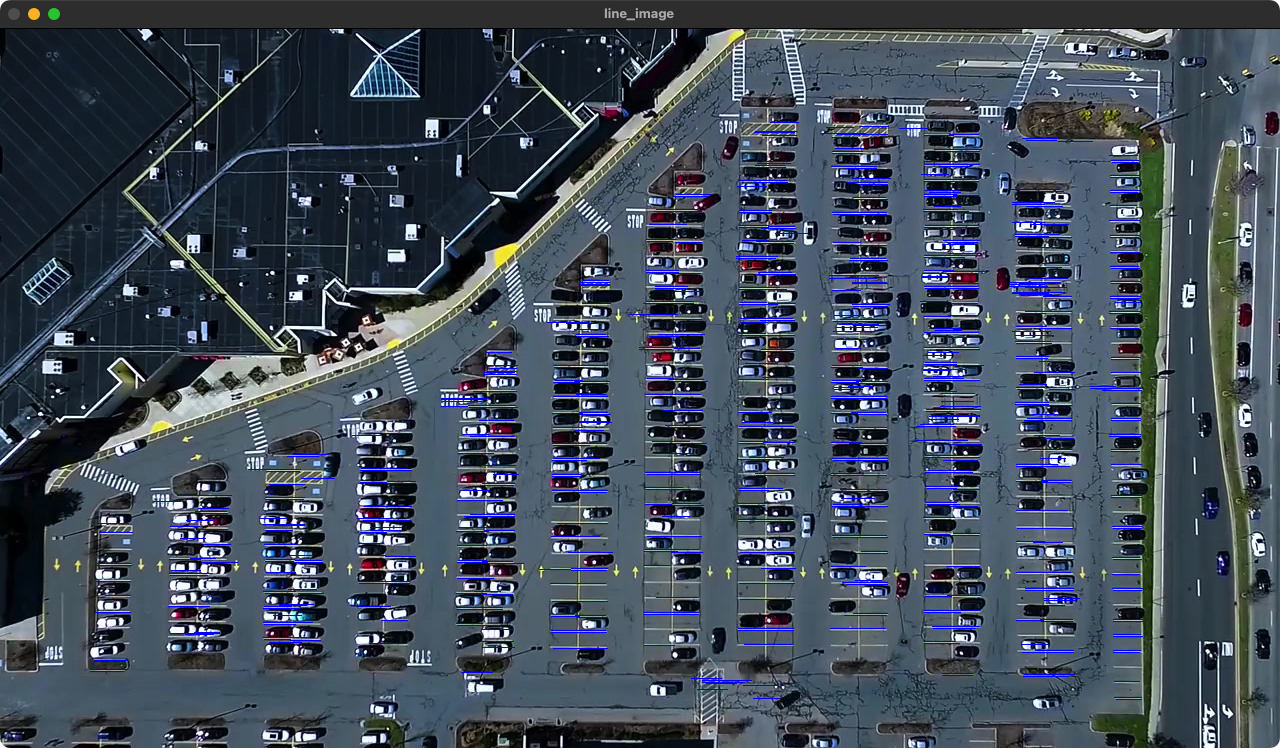
for i in range(0, num_splits + 1):
y = int(y1 + i * gap)
cv2.line(new_image, (x1, y), (x2, y), color, thickness)
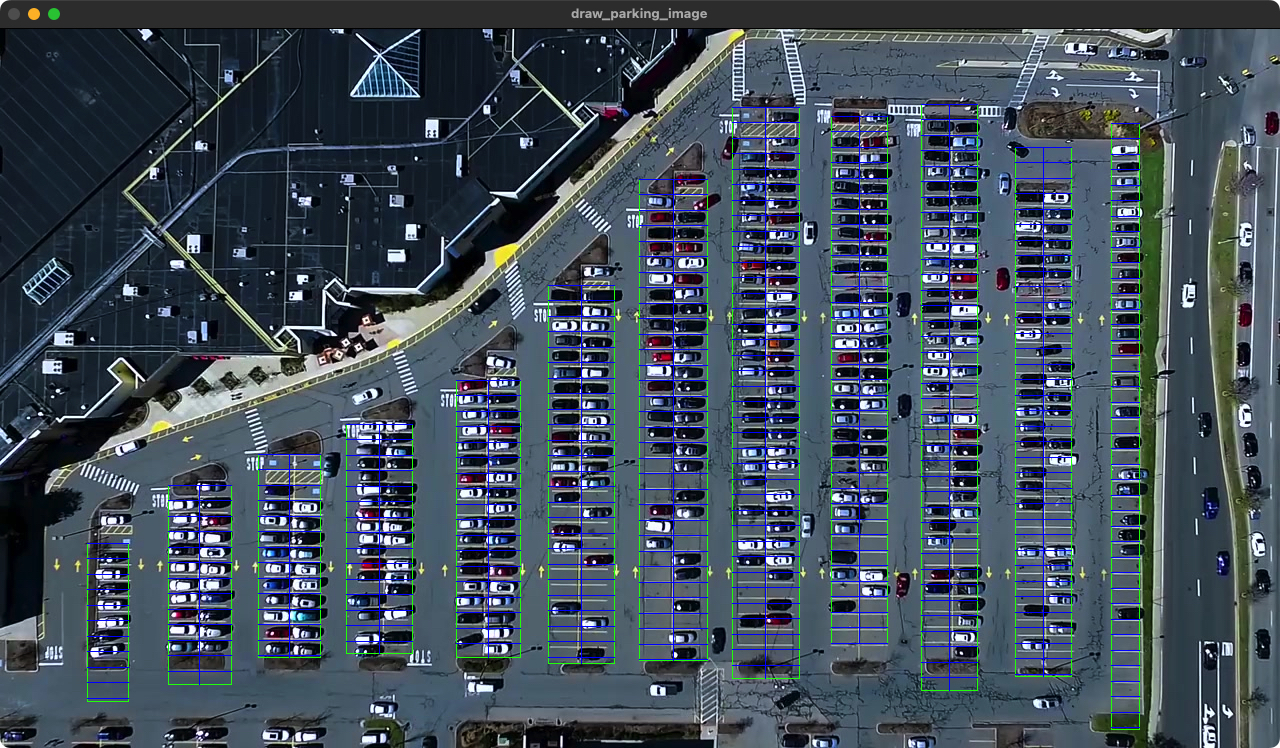
if 0 < key < len(rects) - 1:
x = int((x1 + x2) / 2)
cv2.line(new_image, (x, y1), (x, y2), color, thickness)
if key == 0 or key == (len(rects) - 1):
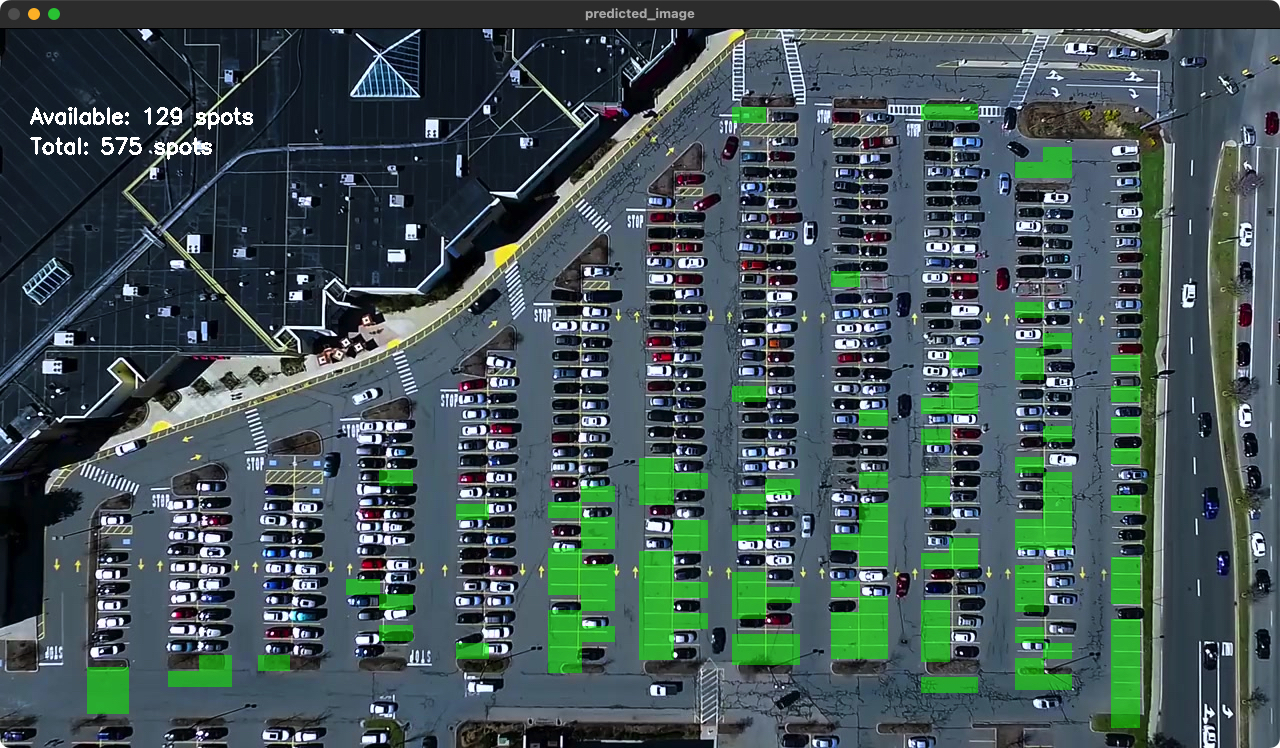
tot_spots += num_splits + 1
else:
tot_spots += 2 * (num_splits + 1)
if key == 0 or key == (len(rects) - 1):
for i in range(0, num_splits + 1):
cur_len = len(spot_dict)
y = int(y1 + i * gap)
spot_dict[(x1, y, x2, y + gap)] = cur_len + 1
else:
for i in range(0, num_splits + 1):
cur_len = len(spot_dict)
y = int(y1 + i * gap)
x = int((x1 + x2) / 2)
spot_dict[(x1, y, x, y + gap)] = cur_len + 1
spot_dict[(x, y, x2, y + gap)] = cur_len + 2
print(f"total parking spaces: {tot_spots}, len: {cur_len} ")
if save:
filename = f'with_parking_{str(random.randint(1000, 9999))}.jpg'
cv2.imwrite(filename, new_image)
return new_image, spot_dict
|